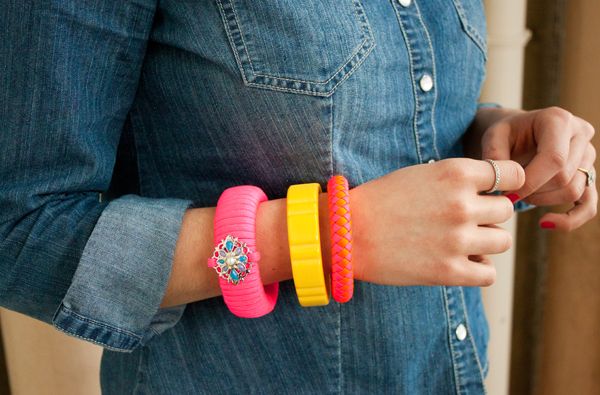
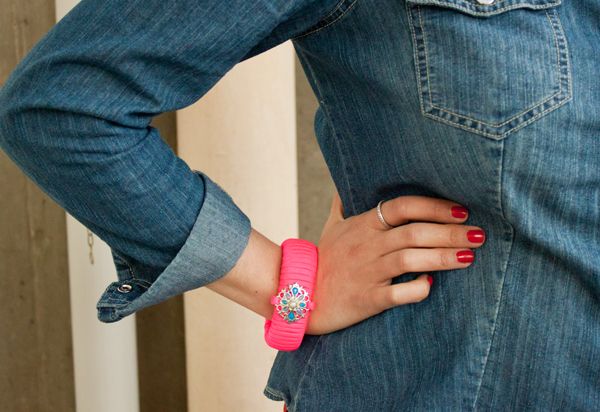
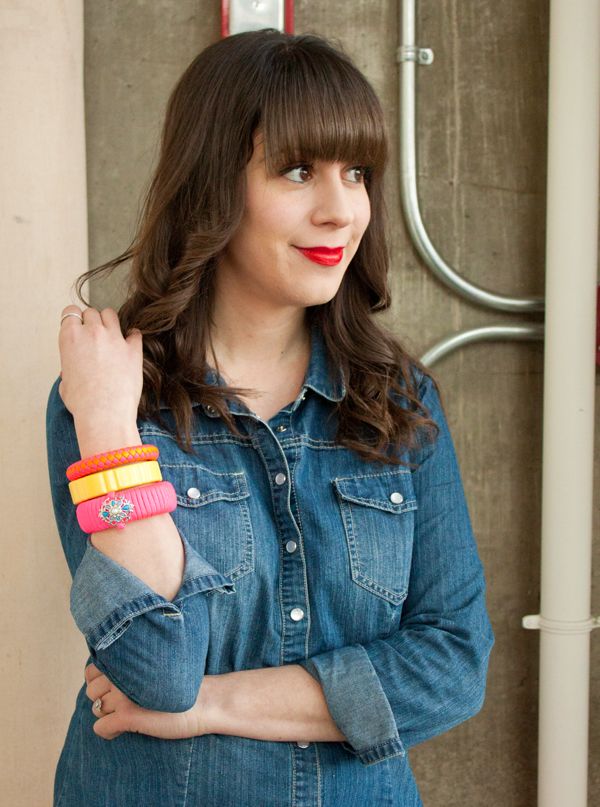
I've been sitting on this DIY for weeks now because I haven't had any spare time to craft... I know, I know, tisk tisk. Anyway, I thought it would be fun to bring life to an old, thrifted bangle, so after picking up some neon thread and a pretty little pendant from Michael's, I was in business. This project was super easy and inexpensive to make, and I'm obsessed with the result... Hey, anything neon is fine by me!
Want to make a bracelet of your own? Here's what you've got to do:
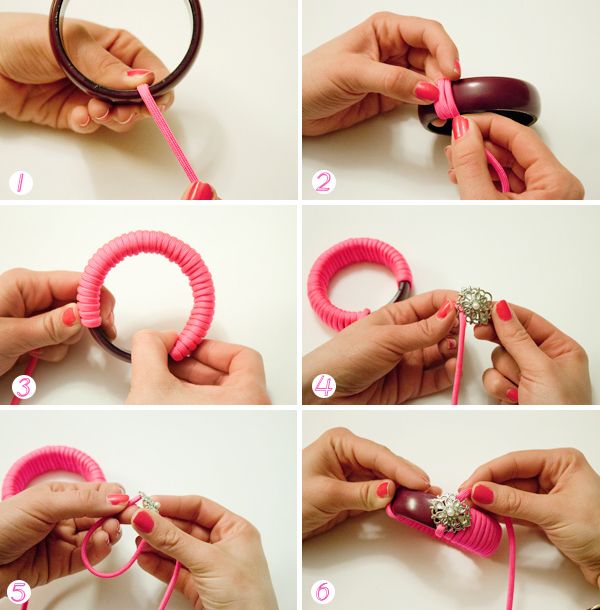
1. Start by securing the rope to your bangle with some glue to hold it in place while you work. The nature of the materials make them hard to adhere, but it will help to have the end temporarily secured.
2. Start wrapping the rope around the bangle, pulling tight as you go around.
3. Continue to tightly wrap the bangle until you get about three quarters of the way around the bracelet.
4/5. Weave the end of the rope through the pendant and out the other side, pulling it through and positioning it on the bangle.
6. Keep wrapping the bangle until the base is no longer visible.
7. Release the glued end and tie a double knot to secure the rope in place.
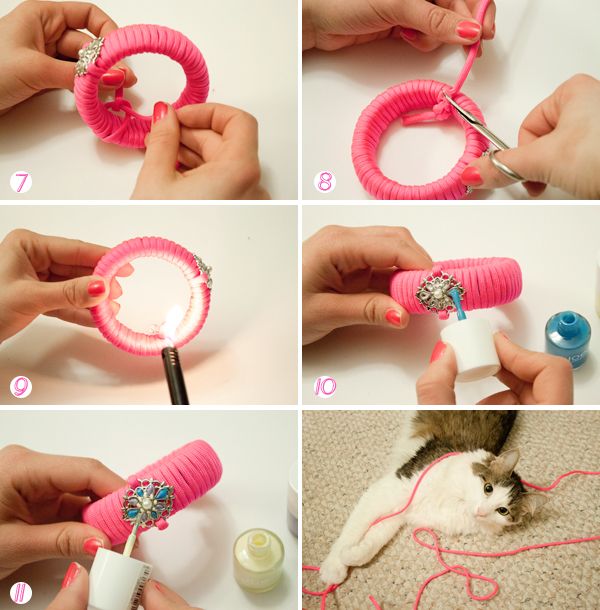
8. Cut the ends off closely.
9. Singe the ends of rope slightly to avoid fraying.
10/11. Paint the pendant with nail polish in colours of your choosing. Add two or three coats depending on the thickness of the polish used.
12. While your bracelet dries, use the leftover rope to play with your cat or any other willing participant... How cute is Meows?!
And that's it! Thanks for reading, lovelies! xx


0 comments:
Post a Comment